Showing posts with label lunch. Show all posts

Wednesday, January 26, 2011

the green monster


The market is bursting with citrus right now, saturated color in yellow, orange, and green.  I can’t seem to help myself when I see these orbs piled high, I inevitably grab way too many thinking that I will incorporated them into something amazing.  Most of the time, they end up just getting eaten out of hand, which isn’t all bad I suppose.

There is one citrus in particular that I had yet to try and that is the Pomelo.  But what to do with this green monster is the question I always seem to ask.

So I did a little Pomelo research…

The Pomelo is native to Southeast Asia and is usually pale green to yellow when ripe.  The flesh is very soft, thick and pudgy.  And sometimes they look all bumpy…I guess that’s normal.  It tastes like a sweet, mild grapefruit and has little, or none of the common grapefruits bitterness.


Ok then, sounds good.

I decided to make a simple salad of segmented Pomelos with butter lettuce, large chunks of avocado, cooked shrimp, drizzled with a simple dressing of shallots, cilantro, some of the juice from the Pomelo and olive oil.  It was delicious!


So if you see this green monster in your local market and haven’t tried it yet…give it whirl.  You won’t be disappointed!

Enjoy!
Shannon


Pomelo Salad with Shrimp and Avocado
Serves 2

1 head butter lettuce
1 Pomelo, segmented (reserve juice for the dressing)
1 lb. cooked shrimp
1 ripe avocado, peeled and sliced
1 Tbsp. chopped shallots
¼ cup chopped cilantro
2 Tbsp. champagne vinegar
¼ cup olive oil
Salt and Pepper
Lime for garnish
Extra cilantro leaves left whole for garnish

For dressing combine in a small bowl the chopped shallots with the reserved Pomelo juice, champagne vinegar and a dash of salt to help soften the shallots a bit.  Begin to assemble the salad, first layering the butter lettuce (I like to keep the leaves whole) then adding the avocado, the cooked shrimp and the segmented Pomelo.  Finish off the dressing by whisking in the olive oil and then tossing in the chopped cilantro.  Taste for seasoning.  Pour over the composed salad and garnish with lime and the reserved cilantro leaves.


Thursday, August 19, 2010

kicking back and some farmer's cheese with stone fruit


Waking up this morning with the knowledge that I had a day off I felt almost giddy and I began to make my list…

It begins with the morning ritual of a walk with my hubby and the dog and then off for coffee at a favorite local hangout.

After the legal addictive stimulant had done its handiwork, it was time to get serious. Should I finally crack open one of the many books that I’ve been meaning to get to or should I hit the beach? Or what about heading out to some of my favorite antique shops to find a lovely treasure that needs a new home? Gardening? Trying out that new recipe?

But after some thought I decided to text a good friend to see if she was up for lunch…thankfully for me she was.

Enjoying the relaxing outdoor atmosphere of my favorite local restaurant Ramos House, it was sheer bliss knowing that the most difficult thing ahead of me was deciding what to order from the menu.

I decided to start with the stone fruit with farmer’s cheese, a mix of peaches, plums and nectarines. It was the perfect start.  Especially since stone fruits are at the peak of the season right now, and with the addition of some fresh mint and blueberries it couldn’t have been a better precursor to my savory main course.


But the thing that took it over the top for me was the farmer’s cheese. The delicate creaminess and slight tang were the perfect accompaniment for the fruit. This cheese has a very creamy mouth feel and can be used in many different applications that call for ricotta and it works beautifully in lasagna as well. It is a little difficult to find, although I’ve seen it in some specialty food stores, but it couldn’t be easier to make yourself.

The process starts by basically taking 1 gallon of whole milk and bringing it up just to the boiling point (190°) over medium heat. Stir occasionally to prevent the milk from scorching on the bottom of the pot.

When the milk begins to reach the 190° point, small bubbles will begin to appear at the edges, turn off the heat. Stir in about ¼ cup lemon juice into the milk and a pinch of salt, and the milk will curdle. You may need to wait 10 to 15 minutes for the curds to fully form.

 
Line a sieve or colander with 4 layers of cheesecloth, and pour the milk through the cloth to catch the curds. This may take a few hours, what is left in the cheesecloth is the Farmer's Cheese. The liquid is the whey. Some people keep the whey and drink it, but I throw it away. Gather the cloth around the cheese, and squeeze out as much of the whey as you can. Wrap in plastic, or place in an airtight container. Store in the refrigerator. This yields about 1 pound of cheese.


Enjoy!
Shannon


Saturday, July 24, 2010

commander in cheese


Roquefort is renowned throughout the world as the “King of Cheeses”. It was named after a village in the south of France and is infamous for its pungent smell and characteristic blue veins of mold.

The story behind the origins of Roquefort blue cheese has been romanticized in an old legend. It begins with a young shepherd who was minding his flock of sheep in the hills of Roquefort when he suddenly sighted a beautiful maiden in the distance. Determined to find her he left his dog to guard the sheep and hastily placed his lunch-bread and ewe’s milk curds in the nearby caves to keep cool. The shepherd was away for days, looking for his maiden. Unfortunately, he never found her. The shepherd, dejected, returned to his sheep tired and hungry. When he took his lunch out of the caves, he found that the bread and milk curds were moldy. His hesitation was brief due to his hunger. With some trepidation, the shepherd took a bite and was pleasantly surprised to find that his moldy lunch tasted so good! Roquefort was born.

Whether this story is true or not, the fact remains that Roquefort is delicious. True, it is an acquired taste, and many are thrown off by its strong smell. But this is a pity, because Roquefort’s moist and creamy texture is a delectable experience not to be missed.

If you are on the fence about this cheese, why not give this recipe a try. It is the classic paring of a sweet tender pear with the salty pungent cheese. Put together in a pastry shell and filled with a simple mixture of cream and eggs. This lovely tart is a perfect lunch dish or served for a light dinner.

Enjoy!
Shannon


Pear and Roquefort Tart
Serves 6

1 recipe for pastry
6 oz. Roquefort
1 ripe pear, peeled, cored, and sliced into small dice
2 eggs
1 cup cream
1 tsp. freshly grated nutmeg
Salt
Freshly ground pepper


After preparing your pastry dough following the link above, place one round of the uncooked pastry dough into a 10” tart shell with removable bottom.


Scatter prepared pear onto the pasty shell evenly. Then using your fingers break off small chunks of the Roquefort cheese and place in between the pear pieces.


In a small bowl beat the eggs lightly, add the cream, nutmeg and salt and pepper. Mix together well. Pour mixture over the pears and cheese. Bake in a 425° preheated oven until set. About 20 minutes. Serve warm or at room temperature.


Wednesday, May 5, 2010

a little inspiration and some soup


Garlic may be available year-round, but the season for young garlic is terribly short, only a few weeks in spring and early summer. At a recent jaunt to the farmers’ market I stumbled across a crate of these naked-looking new bulbs, soil still clinging to their roots and stalks. Their nearly skinless, barely formed cloves have a crunch similar to Granny Smith apples. These immature heads when harvested early are filled with a milky juice that is both pungent and sugary.

For the time-pressed cook, young garlic has a practical payoff: there is no need to remove the annoying raspy skins, as with mature garlic. You can slice and sauté an entire head like an onion, and the green parts of the young garlic are also edible.  Young garlic is an excellent candidate for soups, roasting alongside meats and puréeing for mashed potatoes, aioli and the like.

Coming away from the market with new found inspiration as well as a bunch of beautiful young garlic, some spinach and a couple of potatoes, I rushed home and got cooking.

Enjoy!
Shannon


Young Garlic & Spinach Soup
Inspired by Heidi Swanson
serves 4-6

2 Tbsp. unsalted butter
3 young garlic bulbs with green stalks, bulbs cut into small dice, and green stalks sliced into 1 inch lengths*
2 russet potatoes, unpeeled, ½ inch dice
1 bunch spinach
1 quart chicken stock
¼ cup crème fraîche
½ tsp. freshly ground nutmeg
Salt and freshly ground pepper

Start by washing the spinach really well in several changes of water. Spinach tends to hold dirt on the leaves and stems. Rinse until the water runs clear. Set aside.

In a good sized soup pot melt the butter over low heat until it is softly foaming. Add the young garlic, stems and all and cook until softened and translucent, 5-8 minutes. Add potatoes to the garlic along with the stock and simmer, covered for 20 minutes until potatoes are tender. Take off the stove and add the spinach, stir in until wilted. Purée in small batches using a conventional blender (or you can use an immersion blender if you have one). If using a conventional blender use caution. The hot liquid can create pressure and burst out of the top. To insure against this, use a kitchen towel over the lid holding down firmly. Once puréed add back to the pot and heat gently. Whisk in crème fraîche, add freshly grated nutmeg and season with salt and pepper to taste.

Serve, garnished with chive blossoms if desired.

*If you have trouble finding the young garlic, a substitute of 1 bunch green onions and 3 cloves of garlic would be fine.


Thursday, April 29, 2010

a little lunch and a word on labne


I love the back-palate fieriness that radishes give. Pair that with some hard-cooked farm-fresh eggs, a bit of flaky sea salt and a simple toasted crostini smeared with some homemade Labne and you have a perfect breakfast, lunch or mid-day snack.


Labne is a cheese made from drained Greek style yogurt. It is a Middle Eastern favorite and very easy to make at home. It is delicious used as a spread and can be used as a substitute instead of butter.

When raw materials are this alluring, it just makes me smile.

Enjoy!
Shannon


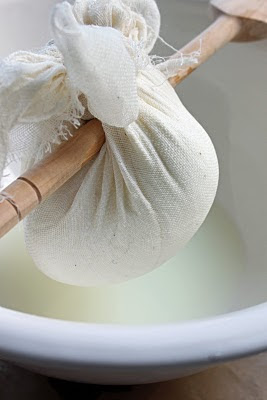
Line a fine sieve with 2 layers of damp muslin, allowing the muslin to overhang. Combine thick natural yogurt, such as Greek-style yogurt, and a little salt in a bowl (this helps draw out the whey). Spoon into the muslin. Draw up the corners of the muslin to cover the yogurt mixture and knot securely. Thread a wooden spoon through the knot and place over a bowl to drain in the fridge for 2-3 days or until the yogurt is very thick. Labne can be stored in the refrigerator for up to one week.


Friday, April 23, 2010

up the coast, part 3


Before making our way back home on the last day of our trip up the coast, we decided to stop into a local dining establishment for breakfast.

Big Sky Cafe has been a local favorite in San Luis Obispo as well as food critics from around the world, since 1994. It has had stellar reviews from such noted publications as the New York Times, the Wall Street Journal, Gourmet Magazine (back in ’08), and even Rachel Ray.

They specialize in using produce from local farms. A quote from the chef/owner Charles Myers was quoted in Gourmet Magazine as saying “Every year our local farm resources deepen and improve…we have an ever expanding palate of organic fruits and vegetables, farmstead cheeses, olive oils, and vintage vinegars to create our fresh market dishes daily.”

The décor of the restaurant is interesting. In that it seems to have this hippie/southwest motif. There are tie-dyed tapestries, a lot of wood paneling, with a bit of odd statuary thrown in for good measure. The desert landscape paintings that are placed around the dining room are lovely, my favorite being the one adjacent to the long hardwood bar.

When looking at the menu I knew I wanted to go beyond the typical omelet or bowl of fruit. This led me to three options the Red Flannel Turkey Hash with Basil-Parmesan glazed eggs, the Devil’s mess, or the Traditional New Mexican Pozole. Decisions, decisions.


I landed on the pozole. A spicy hominy stew with peppers, tomatillos, pumpkins seeds, cumin & cilantro with a poached egg on cornbread with queso fresco.

It was a good choice. So good in fact that since I’ve been home I have been trying to make my own version of pozole that might come somewhat close to theirs. I believe I have succeeded. The earthy dark pasilla chile, along with the fire roasted tomatoes and chicken stock make a soul satisfying broth. The creamy rich avocado and cheese add richness, and the crunch of the toasted pepitas rounds the soup beautifully.

If you want to make the Big Sky version the owner has a blog in which he posted the recipe (just love when they do that!) but it is pretty involved and a little time consuming. My version is much simpler and has its own merits. With or without the cornbread and poached egg this is a tasty breakfast, lunch or dinner.

Enjoy!
Shannon


Pozole my way
serves 4 to 6

3 large dried pasilla (negro) chile, stemmed and seeded
2 15-ounce cans diced tomatoes in juice (preferably fire-roasted)
2 Tbsp. vegetable oil or olive oil
1 medium white onion, roughly chopped
3 garlic cloves, peeled
1 ½ quarts chicken broth (preferably homemade)
1 Tbsp. dried epazote or Mexican oregano
1 Tbsp. cumin
3 15- ounce cans hominy, drained
8 ounces shredded cooked chicken or pork
½ cup toasted pepitas seeds
1 large ripe avocado, pitted, flesh scooped from the skin and cut into ½ cubes
1 cup queso fresco, crumbled
½ cup Mexican crema, sour cream or crème faîche for garnish
Cilantro leaves for garnish
Lime wedges, for serving


Quickly toast the chile by turning it an inch or two above an open flame for a few seconds until its aroma fills the kitchen. (Lacking an open flame, toast it in a dry pan over medium heat, pressing it flat for a few seconds, then flipping it over and pressing it again.) Break the chile into pieces and put in a blender jar along with the tomatoes with their juice. (A food processor will work, though it won’t completely puree the chile.)

Heat the oil in a medium (4-quart) saucepan over medium-high. Add the onion and garlic and cook, stirring frequently, until golden, about 7 minutes. Scoop up the onion and garlic with a slotted spoon, pressing them against the side of the pan to leave behind as much oil as possible, and transfer to the blender with the tomato mixture. Process until smooth.

Return the pan to medium-high heat. When quite hot, add the puree and stir nearly constantly, until thickened to the consistency of tomato paste, about 6 minutes. Add the broth and epazote, if using or Mexican oregano and cumin. Reduce the heat to medium-low and simmer for 15 minutes. Taste and season with salt, usually about a generous teaspoon (depending on the saltiness of the broth).

Just before serving, add the hominy, and chicken to the simmering broth. Divide the pepitas, avocado, cheese and cilantro between the serving bowls. When the hominy and chicken have warmed through, usually about 5 minutes, ladle the soup into the bowls. Garnish with crema. Pass the lime separately

Thursday, April 15, 2010

up the coast, part 1


The hubby and I decided to take a couple days off from work and head up the coast to check out some property in the central coast area. We couldn’t have picked a better time; the weather was cool and clear after a small rain storm the previous day. We got an early start, picked up my caffeine fix and pushed through the L.A. stop and go. But since we were getting away, even the traffic couldn’t faze us. We had our trusty map (which ended up not being so trusty after all) and a list of some highly rated food spots as well as days and times of some local farmers markets in the area that we wanted to check out.

Our first stop was in Pismo Beach which boasts of white sandy beaches, a Monarch Butterfly Grove, hiking trails of beautiful beaches with tide pools, coves and caves. But of course those were not the priority, no I had in mind a tasty bread bowl filled with a rich, creamy clam chowder from Splash Cafe.


Splash is famous for their clam chowder and apparently their recipe has been sought after from publications such as Gourmet and Bon Appetit but to no avail. You can order their chowder online, but if you are driving through, it is worth the stop. When you order the chowder, getting it in the bread bowl is the only way to go.  They cut out the center section of the sourdough boule, grill it up and serve along side the bread bowl for dipping. The chowder is thick and creamy with traces of potato and an underpinning of garlic. So good.


Since I’ve been back home, I have been thinking about the chowder, probably way too much. So I thought I would search out a recipe that might be a close match. This recipe from Restaurant Budd Bay Café in Olympia Washington is pretty darn close to Splash.  So if heading to Splash Café in Pismo Beach isn’t in your upcoming plans making this recipe could be a way to visit Splash vicariously.

Enjoy!
Shannon


Smokey Clam Chowder
Bon Appétit December 1996 Restaurant: Budd Bay Cafe; Olympia, Washington

1 pound russet potatoes, peeled, cut into 1/2-inch pieces
1/2 cup (1 stick) butter
3 celery stalks, chopped
1 medium onion, chopped
1/2 cup all purpose flour
6 8-ounce bottles clam juice
4 6 1/2-ounce cans chopped clams with juices
1 tablespoon chopped fresh parsley
1/2 teaspoon chopped fresh thyme or 1/4 teaspoon dried
1/2 teaspoon chopped fresh marjoram or 1/4 teaspoon dried
1/2 teaspoon chopped fresh dill or 1/4 teaspoon dried dill weed
1/4 teaspoon powdered garlic
1/8 teaspoon liquid smoke*
2 cups whipping cream
1 cup whole milk
1 tsp. sherry for serving (optional)

Boil potatoes in large saucepan of salted water until just tender, about 6 minutes. Drain potatoes well.

Melt butter in heavy large pot over medium-high heat. Add celery and onion and sauté until onion is translucent, about 6 minutes. Add flour and stir 2 minutes. Gradually mix in clam juice. Simmer until beginning to thicken, stirring frequently, about 2 minutes. Add clams with juices, parsley, thyme, marjoram, dill, garlic, liquid smoke and potatoes. Simmer 5 minutes to blend flavors. Add cream and milk. Bring to simmer. Season to taste with salt and pepper. (Can be prepared 1 day ahead. Cover and refrigerate. Bring to simmer before serving.)

Optional:  One ingredient that really makes this chowder exceptional is to pour about a teaspoon of cream sherry on to the top of the chowder right at serving.  I prefer using Fino or Manzanilla which are both pale, straw colored. Both are excellent with seafood, mild cheese, fish or ham. The delicate crisp aroma and nutty flavor are a nice counter balance to the rich and creamy chowder.

*Liquid smoke is a smoke-flavored liquid seasoning available at specialty foods stores and many supermarkets.


Wednesday, April 7, 2010

a day off and Keller's killer tartine

Not to rub it in…but it was an absolutely beautiful day here in Southern California.  Sunny skies and I believe we topped out at 80°. I played some tennis (not very well I might add), sat outside and got a little further along in my current read; Garlic and Sapphires, Ruth Reichl’s book on her life as a restaurant critic for the New York Times, and also decided to make a tuna sandwich for lunch. But not just “a tuna sandwich”; I made Thomas Keller’s’ Tuna Niçoise Tartine, which I adapted from a Bouchon Bakery recipe, and of course had to blog about it, because it is blog worthy.

It is made with a confit of garlic, which is amazingly sweet and creamy, so you won’t have to add as much oil and egg to the aïoli, the base for this little masterpiece. Use the best quality tuna packed in oil that you can find and top with hard-boiled eggs, butter lettuce, thinly sliced radishes and a few Niçoise olives scattered over the top and you have a killer sandwich for any day of the week, rain or shine.

Enjoy!
Shannon


Tuna Niçoise Tartine
adapted from Thomas Keller's recipe from Bouchon Bakery
4 thick slices whole grain or pain de campagne* , to serve
4 butter lettuce leaves, to serve
2 hard-boiled eggs, thinly sliced, to serve
3 radishes, thinly sliced, to serve
8 Niçoise olives, pitted, to serve
To serve: finely chopped chives, sweet paprika and extra-virgin olive oil

Confit garlic aïoli
3 garlic cloves, peeled
1 cup extra-virgin olive oil
2/3 cup canola oil
1 egg, room temperature
1 Tbsp. lemon juice, freshly squeezed

Tuna salad
2 tsp. finely chopped parsley
1 tsp. chives, finely chopped
1 tsp. each finely chopped cornichon, shallot and capers
1 tsp. lemon juice
1 can tuna pack in oil, drained

For confit garlic aïoli, combine garlic and ½ cup olive oil in a small saucepan, cook over low heat until garlic is soft (20-30 minutes). Strain (reserve garlic), combine garlic oil with canola oil and remaining olive oil, set aside. Process egg, lemon juice and reserved garlic in a small food processor or blender until smooth (1-2 minutes). With motor running, gradually add combined oils and process until thick and emulsified. Season to taste, adjust consistency with a little water if necessary, and set aside.

For tuna salad, combine 2-3 tablespoons garlic aïoli, herbs, cornichon, shallot, capers and lemon juice in a bowl. Add tuna and mix until just combined, season to taste.

To serve, spread two bread slices with a little garlic aïoli, top each with two lettuce leaves, layer with tuna salad, egg and radish slices. Garnish with olives, chives and paprika, drizzle with oil, top with remaining bread slices and serve immediately.

*Pain de campagne is a round French country-style loaf similar to sourdough. If unavailable substitute sourdough.

serves 2

Tuesday, April 6, 2010

alla primavera


“Primavera” literally means first spring. Pasta primavera is an Italian-American dish that consists of pasta and fresh vegetables. Some recipes include chicken, sausage or shrimp, but the focus of primavera is the vegetables themselves. The dish is typically highlighted by light flavors, aromatic herbs and bright colors.

I have been eagerly awaiting the arrival of English peas and fava beans, (also known as broad beans) at my local farm stand. Finally on a recent outing I found them, a little mound of each just waiting for me, and thought they would make a lovely addition in a pasta primavera.

I decided on a simply cooked pasta, tossed with some fresh ricotta loosened by a little of the pasta cooking water. Topped with a sprinkling of freshly torn mint and green onions it made a wonderful spring luncheon dish that was perfect served at room temperature.

This kind of dish works well with a simple roasted chicken, or a small rack of lamb, and if the weather warm, this would be a wonderful meal savored outside.

Enjoy!
Shannon


Pasta Primavera
serves 4

1 pound fresh English peas, shelled
1 pound fresh fava beans, shelled (double podding*)
1 pound pasta (spaghetti or linguine)
1 cup ricotta cheese
½ cup freshly grated Parmesan
¼ cup mint, torn in pieces (plus more for garnish)
½ cup sliced spring onions
Olive oil
Salt & freshly ground pepper


Fill a large stockpot with water toss in some salt and bring to a boil; meanwhile prepare an ice bath. Place fava beans in a sieve, and lower into the water. Let water return to a boil, about 1 minute; blanch 1 minute more. Remove sieve from water, and place beans in ice bath. Transfer to a colander; drain. Peel and discard tough outer skins; set favas aside. Using same blanching water and sieve, blanch peas until just tender and bright green, 2 to 3 minutes. Remove sieve from water; transfer peas to ice bath. Transfer peas to a colander, drain and set aside.

Discard blanching water; fill stockpot with fresh water. Add some salt and bring to a boil. Add pasta and cook until al dente.

Meanwhile, combine ricotta, Parmesan, mint, and some salt and pepper to taste. Just before pasta has finished cooking, add 1 cup cooking water to ricotta mixture; stir to combine.

Drain pasta, and transfer to a serving bowl. Add a glug of olive oil and toss. Add ricotta, reserved fava beans, and peas. Toss to combine. Season with additional salt and pepper to taste, sprinkle with mint leaves and green onions; serve.

*Double podding fava beans may seem a bit tedious, but it transforms them from a tough, dull vegetable into tender beans that are beautiful to look at and a treat to eat.


Tuesday, December 8, 2009

F is for fennel


Fennel is among the most versatile of vegetables: it’s good whether eaten raw in salads, or cooked in any number of ways. I enjoy it roasted with other root vegetables as a side dish, or used as an aromatic vegetable, often instead of celery in mirepoix (diced carrots, onion and celery) and other preparations. The flavor of the pale white bulb is reminiscent of anise or licorice. The fibrous green stalks with feathery leaves can be added to stocks for an added depth of flavor. The dark green feathery fronds are a nice touch as a flavorful garnish.

To prepare fennel, trim away the darker fibrous stalk and bottom end, and remove any outer layers that are tough or blemished. Fennel should be cut close to the time it is needed, as it will oxidize and brown over time. Many recipes ask you to remove the core, but I don’t find it necessary; I like the taste of the core and find it quite tender.

One way recently I have enjoyed fennel is by braising it some water with splash of white wine. I serve it with a cabernet wine reduction and a few crumbles of blue cheese. It is a nice light lunch or along side pork roast for dinner.

Enjoy!
Shannon


Braised Fennel
Loosely adapted from Alice Waters The Art of Simple Food

2 or3 fennel bulbs
¼ cup white wine (optional)
4 thyme sprigs
1 bay leaf
½ tsp. fennel seeds, crushed
Olive oil
Salt
Fennel tops

Trim away the root end, cut of the leafy tops and fibrous stalk, peel away any bruised outer layers. Cut each bulb in half and then into three or four wedges. In a heavy-bottomed pan, heat a couple tablespoons of olive oil and brown the fennel wedges lightly, and then add 2 cups of water with the wine, thyme, bay leaf and fennel seeds. Bring to a boil, and then turn down to a simmer. Continue cooking, turning every once in a while until tender, about 10 to 12 minutes.

Tuesday, November 17, 2009

the board

Family traditions are defined as the handing down of statements, beliefs, customs, information, etc., from generation to generation, especially by word of mouth or by practice.

We all have traditions of some sort…some we continue…some we lay aside. Thankfully my friend Carla shared with me a cherished family tradition that I am able to pass along to you.

Carla has a rich Italian background by way of her Sicilian grandmother (who apparently was a “pasta genius”). This little grandma would travel from back east to California when Carla was a young girl, and one of the things on the agenda when she was visiting was to make pasta. Pasta enough to last until the next time Grandma would hop on that plane for another west coast visit. But on Grandma’s first trek out west she said that there was one problem, she couldn’t make the pasta without her wood board; granite or marble would not do. So thanks to a handy young man in the family a wood board was produced. It’s nothing fancy, just a large piece of plywood with a stabilizing wood piece underneath so it would easily sit on top of any counter without moving. Now Grandma was happy, and so were all the hungry pasta recipients.

When it was time to make the goods, Grandma would roll up her sleeves and start mixing, kneading, rolling and cutting all kinds of glorious pasta. Within the fog of flour that would hang in the air, wonderful strands, pillows and sheets of dough would emerge. Everyone got involved; Carla was given the task and title of the “official gnocchi roller” with her famous finger flick style, the final shape for these beauties before they hit the water. And I would like to testify that to roll a gnocchi; especially Carla’s “finger flick” does take skill, of which I have yet to be proficient.

So even though I’m not related to Carla and am Scottish, (which is quite un-inspiring on the food front) I had the opportunity to learn to make Grandmas’ Sicilian style gnocchi. And since Carla brought over Grandmas’ board it made the endeavor even more special.

The result…the gnocchi turned out great. We scattered them on sheet pans and put them in the freezer to firm up before we put them into their respective containers. Thankfully we held a few back so that we could reward ourselves and sample our labor with a simple lunch of gnocchi with browned butter and sage.

They were delicious!

Enjoy!
Shannon


Carla’s Grandmas Amazing Gnocchi
This gnocchi recipe is a little different, in that it uses ricotta cheese as opposed to potatoes.

3-3 ½ cups all purpose flour (start with using 3 cups of the flour first, then add more as needed to get the right consistency)
16 ounces ricotta
2 large eggs, room temperature

Put all the ingredients into the bowl of an electric mixer fitted with the dough hook. Mix on low speed to pull everything together, slowly increase the speed. Let the mixer knead the dough until it begins to “slap” the sides of the mixing bowl. Feel the texture of the dough; if it is still a little sticky add more flour. The final result should be a smooth dough that isn’t sticky.

Put the dough out onto a lightly floured surface, pull off a knob of dough, about the size of a golf ball. Begin to roll out the dough into a long snake that is about a finger width in diameter. Then cut the snake into 1 inch pillows, lightly flour the gnocchi as you cut them. You can cook these as is or form them into the classic gnocchi shape with a gnocchi board, or the tines of a large fork turned upside down (or give Carla a call and see she if she’ll come over to do her famous “finger flick”style). Rest the bottom edge of the gnocchi board on the work surface, and then tilt it at about a 45 degree angle. Take each piece and squish it lightly with your thumb against the board while simultaneously pushing it away from you. It will roll away and around your thumb, taking on a cupped shape -- with ridges on the outer curve from the board and a smooth surface on the inner curve where your thumb was. (Shaping them takes some time and dexterity. You might make a batch just for practice.) The indentation holds the sauce and helps gnocchi cook faster.

As you shape the gnocchi, dust them lightly with flour and scatter them on baking sheets lined with parchment paper or waxed paper. Set gnocchi filled cookie sheets in the freezer for a few minutes to firm them up if you will not cook the gnocchi until the next day or later. Alternatively, you can cook them now, in a large pot of boiling salted water. They are done when they begin to float to the surface, about 5 to 8 minutes. Drain the gnocchi and toss with a little olive oil to keep from sticking. These are wonderful with a simple toss in some brown butter and crispy sage, or one of the ways Carla typically makes these is with a marinara sauce and meatballs.

Wednesday, November 11, 2009

lunch with Teri


There are a few people in my life that I really enjoy spending time with. Unfortunately, because of schedules it doesn’t happen as often as I would like. One of these people is my friend Teri. We have known each other for more years than I want to admit, but even if we haven’t talked or got together in a while we can still pick up right where we left off. It's that kind of comfortable, cozy slipper, wrapped up in a blanket kind of friendship.

On the flip side, she is a creative genius in many ways and when we have an opportunity to do something creative together, whether it is design or food related…stand back! We sort of feed off of each other and when those creative juices start pumping just watch out. Who knows what is going to happen…although the end result is usually quite satisfying.

I put a call into her not so long ago, putting in a request for a lunch date at one of my favorite places to eat in my hometown San Juan Capistrano. It’s called Ramos House. The idea of the restaurant/ house is simple; like the old days, its owner lives and works at the house, the wines are kept in the cellar, the herbs are grown in the garden and the ice cream is turned out back. The menu changes daily and everything is made from scratch.  I have probably eaten everything on the menu, or close to it.

This particular day sitting out on Ramos’ covered patio, it was a little cool. Although I was sitting next to the wood burning stove with one of the provided blankets on my lap, I wanted something warm. The Corn Chowder with Truffled Popcorn was the ticket.

Thankfully, for both you and me John Q. the chef/owner has published his cookbook Ramos House Cafe: Recipes from the first 5 years  so I am able to share this recipe with you.

I did make this at home and it was just as good…although it would have been better if Teri were there.

Enjoy!
Shannon


Corn Chowder
From the Ramos House

10 ears of sweet white corn
1 yellow onion, diced (1 cup)
¾ cup butter
¾ cup masa harina (corn flour)
½ cup diced red bell peppers
1 bunch scallions, thinly chopped
½ cup celery, diced
1 Tbsp. chipotle chilies, pureed
1 cup white corn hominy
1 tsp. dried oregano
1 tsp. garlic, minced
1 tsp. fresh chopped thyme
1 russet potato, diced into ¼ inch cubes

Freshly popped corn
Truffle oil (optional)

Method:
Cut kernels from the cobs and set aside. Place corn cobs in a large stock pot and cover with water (approx. 8 cups). Bring water to a boil, reduce heat and simmer for 1 hour. Remove from heat and strain the corn stock through a sieve, discarding the cobs and reserving the liquid.

In a separate stock pot, melt butter over medium heat. Add masa harina and incorporate using a whisk. Stirring constantly over medium-low heat, cook the masa roux for approximately 5 minutes. Add onions, peppers, celery, garlic, scallions, oregano, thyme, chipotles, and reserved corn kernels. Stir to coat the vegetables with roux. Cook for 5 more minutes over medium, stirring occasionally to avoid scorching the bottom of the pot. Add corn broth and remaining ingredients, bring to a simmer. If soup seems too thick, add water, chicken stock or vegetable stock. Reduce heat and simmer for 20 minutes or until potatoes are tender. Taste and season with salt and pepper. Top off with some freshly popped corn and drizzle on some truffle oil.

Serves 6 -8

Saturday, November 7, 2009

order up!


So what to have for lunch. I knew I wanted to use up those remaining figs before they shriveled up and ended up in the compost pile. After giving some thought to what would go well with the figs, I decided on some thinly sliced salty prosciutto, with maybe a little Burrata cheese, that lovely fresh mozzarella filled with mascarpone. Burratas’ outer bite is soft and springy while the filling melts in your mouth. This luscious, creamy cheese has a hint of sweetness-the ultimate little surprise package. I also had a jar of an organic Adriatic fig spread in the fridge. It is an outrageously rich preserve that pairs beautifully with many things including pears, blue cheese and walnuts or even fresh goat cheese or aged Manchego, but thought it would go very well with figs (fresh or dried) as well.
The final conclusion, a Panini made from a fresh farmers loaf I get from a local German bakery. I added a drizzle of olive oil to moisten each slice of bread. Put a touch of the fig spread on one slice, and then spread out a generous layer of prosciutto. I hand-tore the Burrata and laid that over the top of the prosciutto then sliced a couple of figs to top it all off.

If you don’t have a Panini press you can make do with a regular skillet and weight it down with another skillet or even a brick wrapped in foil works as well. Cook until cheese melts and the outside is a lovely golden color.


Enjoy!
Shannon

Tuesday, September 29, 2009

heirloom salad


I am almost giddy when I arrive at the farmer's market and I see an entire length of a table given to a showcase some of the most glorioius tomotoes this season has to offer.  There are so many heirloom varieties now at our fingertips, from the typical deep red Beefsteaks (some literally the size of a porter house) to the purplish black Brandywine tomatoes.  The Green Zebra has green and yellow stripes which not only give it a unique color but it also has a full bodied tomato flavor as well.

Then there is the Golden Queen, a large yellow variety that when ripe has a pinkish hue at the blossom end, and when cut into the color continues with streaks of orange and red.  Honestly, these are so delicious with just a sprinkling of sea salt and a fresh grind of pepper, you don't need much more to enjoy them.


But to take it up a slight notch, I made a preserved lemon vinaigrette to dress some baby greens, slices of tomato and topped it off with a shaving of good Parmesan.

Pretty simple.  But tasty.

Enjoy!

Shannon


Preserved Lemon Vinaigrette
makes enough for a salad for 4

Depending on the salty intensity of your preserved lemons, you may or may not want to rinse them.  Use only the rind for this vinaigrette.

rind of half a preserved lemon
juice of half a fresh lemon
1/2 cup really good extra virgin olive oil
salt and freshly ground pepper

Coarsely chop the preserved lemon rind and put into a blender or food processor with the fresh lemon juice, process until smooth.  With the machine still running add the olive oil in a single stream to create a nice emulsion.  Season to taste with salt and pepper.

Lightly dress salad greens and tomato slices and top off with shavings of fresh Parmesan.