Tuesday, January 26, 2010

the time has come

After seeing the movie Julie & Julia, the film that intertwines the story of the legendary grande dame of food Julia Child with food blogger Julie Powell, I knew the classic Boeuf à la Bourguignonne that was immortalized throughout the story would finally end up on our table.

So last week when it seemed that we finally had what we call “winter” here in southern California, basically it just rained for about 5 days in a row, I decided it was time to make it. I followed the recipe verbatim, not wanting to disappoint Julia I suppose.

There are really not that many ingredients but the steps and the time involved are the key factors. What I found was that even a mediocre cut of beef works quite well, since it cooks for so long in the wine, it breaks down beautifully. For the wine, buy something you would enjoy drinking along with the meal. I used a young red Beaujolais. But a nice Burgundy or a full-bodied Chianti would work well too. Traditionally boiled potatoes are served with this dish, but buttered noodles or steamed rice may be substituted.

Enjoy!
Shannon


Boeuf Bourguignon
From Julia Childs Mastering the Art of French Cooking
6 ounces chunk of bacon
1 Tbsp. olive oil
3 lbs. lean stewing beef, cut into 2 inch cubes
1 sliced carrot
1 sliced onion
1 tsp. salt
¼ tsp. pepper
2 Tbsp. flour
3 cups red wine
2 to 3 cups brown beef stock
1 Tbsp. tomato paste
2 cloves mashed garlic
½ tsp. thyme
1 crumbled bay leaf
18 to 24 small white onions, brown braised in stock
1 lb. quartered fresh mushrooms sautéed in butter
Parsley sprigs


Remove rind from bacon, and cut bacon into lardons (sticks, 1/4 inch thick and 1 1/2 inches long). Simmer rind and bacon for 10 minutes in 1 1/2 quarts of water. Drain and dry.

Preheat oven to 450 degrees.

Sauté the bacon in the oil over moderate heat for 2 to 3 minutes to brown lightly. Remove to a side dish with a slotted spoon. Set casserole aside. Reheat until fat is almost smoking before you sauté the beef.

Dry the stewing beef in paper towels; it will not brown if it is damp. Sauté it, a few pieces at a time, in the hot oil and bacon fat until nicely browned on all sides. Add it to the bacon.

In the same fat, brown the sliced vegetables. Pour out the sautéing fat.

Return the beef and bacon to the casserole and toss with the salt and pepper. Then sprinkle on the flour and toss again to coat the beef lightly with the flour. Set casserole uncovered in middle position of preheated oven for 4 minutes. Toss the meat and return to oven for 4 minutes more. (This browns the flour and covers the meat with a light crust.) Remove casserole, and turn oven down to 325 degrees.


Stir in the wine, and enough stock or bouillon so that the meat is barely covered. Add the tomato paste, garlic, herbs, and bacon rind. Bring to simmer on top of the stove. Then cover the casserole and set in lower third of preheated oven. Regulate heat so liquid simmers very slowly for 2 1/2 to 3 hours. The meat is done when a fork pierces it easily.

While the beef is cooking, prepare the onions and mushrooms. Set them aside until needed.

When the meat is tender, pour the contents of the casserole into a sieve set over a saucepan. Wash out the casserole and return the beef and bacon to it. Distribute the cooked onions and mushrooms over the meat.

Skim fat off the sauce. Simmer sauce for a minute or two, skimming off additional fat as it rises. You should have about 2 1/2 cups of sauce thick enough to coat a spoon lightly. If too thin, boil it down rapidly. If too thick, mix in a few tablespoons of stock or canned bouillon. Taste carefully for seasoning. Pour the sauce over the meat and vegetables. Recipe may be completed in advance to this point.

For immediate serving: Cover the casserole and simmer for 2 to 3 minutes, basting the meat and vegetables with the sauce several times. Serve in its casserole, or arrange the stew on a platter surrounded with potatoes, noodles, or rice, and decorated with parsley.

For later serving: When cold, cover and refrigerate. About 15 to 20 minutes before serving, bring to the simmer, cover, and simmer very slowly for 10 minutes, occasionally basting the meat and vegetables with the sauce.

Serves 6

Red meat is not bad for you. Now blue-green meat, that’s bad for you! ~Tommy Smothers

Monday, January 25, 2010

special request


The other day I was in the kitchen in the midst of creating some concoction when my husband came in and asked what I was making. I went into great detail about the ingredients and process as he listened patiently. When I finished with my tediously verbose food tirade, he looked at me and said…"I really like blueberry muffins". I couldn’t help but laugh. Sometimes I get so wrapped up in brioche this or calfoutis that I forget about the simple pleasures of a lovely muffin dosed in butter (French butter of course).

The next morning I complied with my sweet husbands request and made Rick Katz amazing blueberry muffins. There is a beautiful lightness about these muffins. Savored while still warm, the texture is melt-on-your-tongue light; only the plump blueberries seem substantial. The next day, when they have settled down, they are a different kind of wonderful. That is the day you might want to slice them, toast them, and let a little butter melt into them. Delish.

Enjoy!
Shannon

Blueberry Muffins
by Rick Katz

1 ¾ cup cake flour
2 tsp. baking soda
1 tsp. cream of tartar
1 tsp. salt
1 pint fresh blueberries
¾ cup milk
¼ cup sour cream
1 stick (4 ounces) unsalted butter, at room temperature
2/3 cup sugar
1 large egg, at room temperature
1 large egg yolk, at room temperature


Position a rack in the center of the oven and preheat the oven to 400°F. Butter or spray 18 muffin cups or line them with paper bake cups. If you have two muffin tins with 12 cups, fill the 6 cups that will be empty in one of the tins with water-this will help the muffins bake evenly.

Sift the cake flour, baking soda, cream of tartar, and salt together twice, and leave sifted dry ingredients in the sifter or strainer; set it on a piece of waxed paper. Remove a tablespoon or two of the dry ingredients and toss with the blueberries. In a separate bowl, stir the milk and sour cream together and set aside until needed.

In a mixer fitted with the paddle attachment (or work with a handheld mixer), beat the butter on medium speed until white and pale, about 3 minutes. Add the sugar and beat until the mixer no longer feels grainy, about 3 minutes, scraping down the paddle and the sides of the bowl as needed. Add the eggs, yolk and beat until the mixture is fluffy, about 2 minutes.

Remove the bowl from the mixer and sift half of the dry ingredients into the bowl. Add half of the milk and sour cream mixture and, using a large rubber spatula, delicately fold the ingredients together, stopping when barely combined. Add the remaining dry and liquid ingredients and fold in only until just mixed-don’t be concerned about getting everything evenly incorporated. Sprinkle over the blueberries and fold them in only to the just-mixed stage.

Spoon the batter into the prepared muffin tins, filling each cup at least two-thirds full, and bake for 18-20 minutes, or until the tops, which will be flat, are golden and spring back when lightly pressed. Turn the muffins out onto a cooling rack and allow them to cool for 10 to 15 minutes before serving.

Storing: The muffins will stay light and lovely for a day. If you are not going to serve them within a few hours of baking, pack them into a plastic bag; they’ll keep for 1 more day and will them be best sliced and toasted. For longer storage, wrap airtight and freeze for up to a month. Thaw, still wrapped, at room temperature.

Sunday, January 17, 2010

things that go together


When I think of things that go together I think of:

Salt & pepper
Batman & Robin
Chocolate & Vanilla
Fred & Ginger
Dooney & Burke
Bert & Ernie

And of course we cannot leave out the iconic classic American food pairing… Peanut Butter & Jelly!  I would imagine that unless you have some sort of food allergy you probably grew up on this combo stuck between two slices of white bread. Or in my case, wheat bread that was so dry and had so many seeds in it you couldn’t tell if the peanut butter was creamy or crunchy. In any case it is familiar.


I admit I haven’t had a PB & J sandwich in a while, but I do have this combination in bar form. I have had this recipe in my repertoire for several years now from the Barefoot Contessa herself, Ina Garten. It is one of those old stand-by’s that seems to always receive many a praise.

Enjoy!
Shannon


PB & J Bars
Adapted from the Barefoot Contessa

1/2 pound (2 sticks) unsalted butter, at room temperature
1 1/2 cups sugar
1 teaspoon pure vanilla extract
2 extra-large eggs, at room temperature
2 cups (18 ounces) creamy or chunky whatever you have on hand
3 cups all-purpose flour
1 teaspoon baking powder
1 1/2 teaspoons kosher salt
1 1/2 cups (18 ounces) strawberry jam or other jam
2/3 cups salted peanuts, coarsely chopped


Preheat the oven to 350 degrees F.
Grease a 9 by 13 by 2-inch cake pan. Line it with parchment paper, then grease and flour the pan.

In the bowl of an electric mixer fitted with the paddle attachment, cream the butter and sugar on medium speed until light yellow, about 2 minutes. With the mixer on low speed, add the vanilla, eggs, and peanut butter and mix until all ingredients are combined.

In a small bowl, sift together the flour, baking powder, and salt. With the mixer on low speed, slowly add the flour mixture to the peanut butter mixture. Mix just until combined.

Spread 2/3 of the dough into the prepared cake pan and spread over the bottom with a knife or offset spatula. Spread the jam evenly over the dough. Drop small globs of the remaining dough evenly over the jam. Don't worry if all the jam isn't covered; it will spread in the oven. Sprinkle with chopped peanuts and bake for 45 minutes, until golden brown. Cool and cut into squares.


Thursday, January 14, 2010

well preserved


Okay I did it. I finally “canned” something. I have been a little intimidated by the whole idea: the process, the equipment, as well as the whole bacteria thing. But actually, it wasn’t that bad. I followed each step carefully and ended up with something that is so good, it is actually “blog worthy.”

Most of us probably remember our mothers or grandmothers painstakingly canning tomatoes or pickles outside on a sweltering summer day so they’d be able to grab them from the basement or pantry come winter. But seriously, “who still does this?” I thought. Honestly, I never thought I would ever want to “can” something. But when I found Eugenia Bones' book last spring, she inspired me. Her recipes are updated for the palate of today with things like: strawberry balsamic jam, pear, port and thyme conserve or figs in brandy. Or on the more savory side stewed onions with marjoram, zucchini flower sauce and marinated baby artichokes. I was hooked.

No more putting it off, it was time.

Her recipe for Three-Citrus Marmalade looked so tasty, and since Meyer lemons and Blood oranges are in season right now it seemed as good a time as any to jump right in and bite the bullet. This marmalade is wonderful on scones and toast or warmed up and poured over vanilla ice cream or toasted cake, but because it is not too sweet, this marmalade would be terrific with cooked fish, poultry or even pork.

So if you’ve been considering the possibility of trying your hand at canning, I would encourage you to do so. There are many great resources out there that will take you through the process step by step. And the satisfaction of being able to take the seasons’ delicious bounty to savor later in the year is totally worth it, as well as never again having to open your cupboard or refrigerator and lament that there’s “nothing to eat!” Instead, you’ll be whipping up the seasons’ best meals all year long.

Enjoy!
Shannon


Three-Citrus Marmalade
From Eugenia Bones’ book Well Preserved

1 grapefruit (red preferred)
3 oranges (blood or Honeybell)
3 Meyer lemons
5 cups sugar
½ tsp. unsalted butter

Peel the skin off the fruit in as big pieces as you can use your hands or a paring knife. Cut most of the white pith off the peels of 1 orange and 2 lemons by scraping it away with a paring knife. Discard the remaining peels or save for other uses. Cut away any pith remaining on the peeled fruits. It’s okay if you don’t get all the pith off the fruit and rind.

Cut the reserved rinds into little matchsticks. You should have about 1 cup.

Cut the fruit in half along the equator and pop the seeds out with the tip of a paring knife. Grind the fruit in a food processor to a chunky pulp. There should be about 5 cups. But measure the pulp you have, as there can be some variation in the amount of pulp a piece of fruit produces, and you will have to adjust the amount of sugar you add accordingly: 1 cup sugar for every 1 cup of pulp.

In a medium pot, cover the silvered rinds with 3 cups of water. Cook over medium heat until the rinds are tender, about 25 minutes. Do not drain. Cool, then add the pulp and let it rest for 2 hours, covered in the fridge. (I did this the day before)

Transfer the pulp, the rinds, and their cooking water to a large, wide heavy pot. Add the sugar and the butter. (the butter help keep the marmalade from foaming up, although it will still foam up some.)

Cook over medium-low heat for about 30 minutes until it reaches 220°. It must reach this temperature to jell properly. (mine took much longer, more like an hour) If you have a candy thermometer, simply stick it in the hot marmalade and let it rest against the side of the pot.

While the jam is cooking away, bring 4 half-pint jars to a boil in a large pot of water fitted with a rack. Boil for 10 minutes to kill any bacteria. Remove the jars with tongs (the tongs don’t need to be sterilized). Simmer new lids in a small pan of hot water to soften the rubberized flange. When the jars are dry but still hot, pour in the marmalade, leaving ½ to ¾ inch of headspace at the top of each jar. Wipe the rims, set on the lids, and screw on the bands finger tip tight.


Place the jars in a pot fitted with a rack and add enough water to cover the jars by 3 inches. Bring the water to a boil over high heat. Process the marmalade for 10 minutes. Turn off the heat and, after about 5 minutes, remove the jars. The marmalade will seem runny at first. It’s okay. It will thicken up as it cools. You will hear a popping noise as the vacuum is created in the jars. Allow the jars to sit, untouched, for 4 to 6 hours. When they are cool, test the seals. (You can test a seal by unscrewing the band and lifting the jar by the edges of the lid. If you can lift the jar, the seal is good. If the lid comes off the seal has failed and you must reprocess the jars with new lids. Don’t worry though; the failure rate is really quite low.)

Store in a cool, dark place for up to 1 year. Refrigerate after opening.


Sunday, January 10, 2010

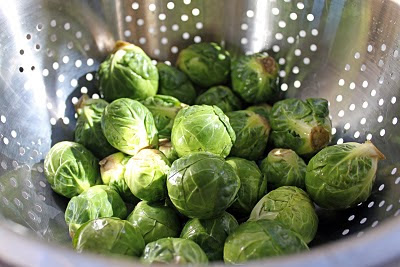
a word on brussels sprouts and marriage


2010 marks a new decade, a list of resolutions but also for my husband and I it is the year we will celebrate our 25th wedding anniversary! I don’t want to sound corny and sappy but honestly, I have a great marriage. If you asked me “What is the secret to a good marriage?” One of the first things I would say is learn to compromise and not to hold to tightly to the whole “me first” philosophy. There are many other things that could be said on what makes a good marriage, but since this is a food blog and not the Dr. Laura show we will keep it on food.

This brings me to the topic of Brussels sprouts. You see, I really like them. I like them roasted, braised, and even raw with a little salt. But when my husband hears the words “B sprouts”, he goes off on a rant. He absolutely cannot stand them.

He even threatened that he wouldn’t read this blog because it would have photos of the little “creatures” (I think he was kidding, I will let you know). But in order to keep the peace in our home I decided that I would only make them when he is traveling, and not just overnight but gone for a few days, just to make sure the smell has completely dissipated from the house. Yes, folks: compromise.

So this week was my chance; he was going back east on business. And although I don’t like for him to be away, I knew this was my opportunity to make a recipe I’ve had tucked away for sometime. These little beauties turned out so good I believe they could convert some of those “on the fence” brussels sprout people….just not my husband.

Enjoy!
Shannon


Bacon-Braised Brussels Sprouts
Loosely adapted from Tyler Florence

1 ½ pounds Brussels sprouts, washed and then cut in half
3 strips of bacon (about 4 ounces) cut into small squares
1 clove garlic, peeled and smashed, plus 2 cloves, roughly chopped
4 sprigs thyme, plus 2 sprigs thyme, leaves only, chopped
2 cups chicken stock
Salt & Freshly ground black pepper
3 Tbsp. balsamic vinegar
1 cup panko bread crumbs
2 sprigs rosemary, leaves only, chopped
Extra-virgin olive oil

Take a large pan and set over medium-high heat. Add bacon and cook until fat renders 2 to 3 minutes. Add the smashed garlic clove, thyme sprigs and Brussels sprouts and cook gently until slightly caramelized. Add stock and reduce heat to a simmer, season with salt and pepper. Cover and simmer for 12 to 15 minutes until tender. Remove lid and add a splash of vinegar and reduce until syrupy, 2 to 3 minutes. If there is still too much liquid, remove the Brussels sprouts and raise the heat and let mixture reduce further. Then return the Brussels sprouts back to the pan.

In a small skillet over medium-high heat add a splash of olive oil then the panko bread crumbs, rosemary, thyme leaves and chopped garlic. Stir until mixture turns golden and fragrant. Season with salt and pepper.

To serve place Brussels sprouts in a serving bowl and top with panko mixture.

Serves 4


Thursday, January 7, 2010

finding common ground


True, persimmons are an acquired taste, often falling into the black or white categories of “I love them” or “I hate them.”

I have to admit, I have been a member of the latter.

Persimmons are native to China and have been around for a long time. There are many varieties of persimmons but the most common is the Hachiya. It is an astringent fruit, shaped like a large, pointy-bottomed tomato. The key to enjoying your persimmon is to wait until it is fully ripe (American persimmons are completely inedible until they are fully ripe) and fully ripe means waiting until it is mushy, bright orange, and jelly-like inside.

These bright orange orbs have been making regular appearances at my local farmer’s market…and I’ve been debating “should I get some?” I have tried them alone, and they didn’t do much for me. I couldn’t get past the “mushy” “gelatinous” consistency. I want to like them; I just decided I needed to figure out how to use them so that I would like them.

So the hunt began, looking at different recipes that use persimmons. You may be surprised by the number of cake, cookie, ice cream, bread, and pie recipes in which use this prized, and usually prolific fruit as a healthy and unique sugar alternative. I found that most of the recipes used them in a puréed form. Once they have turned soft, you can run them through a food mill quite easily.


Not too long ago I heard about a persimmon bread pudding at a favorite local restaurant of mine Ramos House.  I decided that it sounded so darn good it was worth some recipe testing.

The result: a yummy egg bread that was soaked in probably way too much cream, eggs and the persimmon purée, along with a splash of cognac (I couldn’t help myself) and a little lemon zest. To that add some delicious red tart cranberries that I still had in the freezer and then bake until puffed and golden. Finish it off with a little homemade whipped cream or Crème Anglaise.  Perfection!

Then again, if cooking with persimmons isn’t your thing, you can always make the bread pudding without the persimmon purée; just add a little more liquid. You could also throw in some raisins and toasted walnuts as well.

Enjoy!
Shannon


Persimmon and Cranberry Winter Bread Pudding
Serves 6 to 8

1 ½ cups cream (or whole milk)
1 1/2 cups persimmon purée from about 2 lb. very ripe Hachiya persimmons
3/4 cup packed dark brown sugar
6 large eggs
1 teaspoon vanilla
Splash of cognac (optional)
2 lemons, zest only
1/8 teaspoon salt
½ cup fresh or frozen whole cranberries
8 cups cubed (1-inch) challah or soft white Italian bread
1 1/2 tablespoons unsalted butter, cut into bits
1 Tbsp. turbinado sugar (sugar in the raw-optional)
Accompaniment: whipped cream or Crème Anglaise

Whisk together cream or milk, persimmon purée, brown sugar, eggs, vanilla, cognac, zest and salt in a large bowl, then stir in bread and let mixture stand at room temperature 15 minutes.

Put oven rack in middle position and preheat oven to 375°F.

Stir cranberries into bread pudding, then spoon pudding into a buttered shallow 8-inch square (2-quart) glass or ceramic baking dish, spreading evenly. Dot with butter bits and turbinado sugar. Bake pudding until golden, puffed, and set, 35 to 40 minutes. Cool to warm in pan on a rack, about 20 minutes.

Bread pudding can be made 1 day ahead and cooled completely, uncovered, then chilled, covered. Reheat, uncovered, in a preheated 350°F oven until warm.

Note: Persimmon purée keeps, chilled, 3 days (cover surface with plastic wrap, then cover bowl with another layer of plastic wrap) or frozen 1 month in an airtight container.